Hope the forums come back up soon!
Here are my plugins, working with 1.3 [CB#431]:
Persistence v0.50 : Persistence.jar
Spells v0.96 : Spells.jar
Wand v0.64 : Wand.jar
NetherGate v0.44 : NetherGate.jar
CrowdControl v0.17 : CrowdControl.jar
I haven't had time to really see if CC is actually working anymore, but everything else works. Material cycling is temporarily disabled in Wand on account of Player.isSneaking being broken (looks like it points to "isAlive" now!)
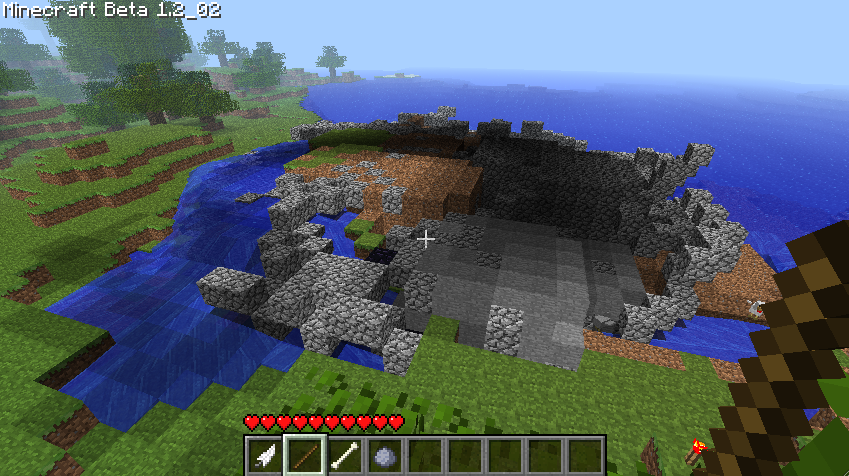
Also, Spells v0.96 has two very new, very dangerous spells- fire and lava. Observe the terrifying and devastating effects in my testing, here.
CC changes the order of parameters for "control"- you can now simply do "/crowd control creeper giant" to swap creepers for giants, or "/crowd control creeper giant 50" to swap half of the creepers for giants.
NetherGate hasn't changed much on the outside- but I was right in the middle of getting portal tracking up and running! Should be soon.. OH! Also, I did add that "/nether list worlds" command.
Oh, and the base fire spell closes the gap in constructing and activating a portal entirely with the wand. Pretty cool, and is basically why I got distracted on finally implementing fire (and then lava) in the first place.
Come visit, play around if you want: mine.elmakers.com
Wednesday, February 23, 2011
Saturday, February 19, 2011
Getting Started With Bukkit Plugin Development
Getting started with Bukkit plugin programming can seem daunting- but if you follow these instructions, to the letter, you should be able to get yourself set up and ready to go!
Before you start: Check out the bukkit wiki first, look in the "Getting Started" section.... I'm going to be updating that instead! This page will stay around for now, for Persistence and Gameplay tutorials.
Contents
Tools
Getting Eclipse Set Up
Donwloading Eclipse Plugins
Tools
This tutorial uses the following technology:
If you prefer other tools/environments, you're going to be somewhat on your own, but this tutorial may still be useful.
Getting Eclipse Set Up
Start by downloading Eclipse. This is the only thing you should need to download directly- install it and get it started. Set up a "workspace"- this just a folder where you'll keep your code. Check the "use this as default and don't ask again" box:


 You can have as many different perspectives "open" at one time, and switch between then using these controls. You may also customize any perspective- adding views, toolbar buttons, etc, as you see fit.
Before you start: Check out the bukkit wiki first, look in the "Getting Started" section.... I'm going to be updating that instead! This page will stay around for now, for Persistence and Gameplay tutorials.
Contents
Tools
Getting Eclipse Set Up
Donwloading Eclipse Plugins
Tools
This tutorial uses the following technology:
- Eclipse - get the latest version, for Java devs
- git - I recommend that you use git for version control, even if just locally
- EGit - an Eclipse plugin for easy git use, available in the Eclipse Marketplace
- github.com - It's a good idea to get a github account, and I recommend you go open source!
- Maven - Maven is a dependency management and build system
- Eclipse Plugin for Maven - Integrates Maven into Eclipse
If you prefer other tools/environments, you're going to be somewhat on your own, but this tutorial may still be useful.
Getting Eclipse Set Up
Start by downloading Eclipse. This is the only thing you should need to download directly- install it and get it started. Set up a "workspace"- this just a folder where you'll keep your code. Check the "use this as default and don't ask again" box:
Now, you should get a welcome screen like this:
You can close the "Welcome" tab using the "x" or explore what it has to offer if you're a first-time Eclipse user. Eclipse is a very powerful IDE- you will get to learn it over the course of this tutorial, but it's worth you time to explore what's there.
When you're ready, close the "Welcome" tab and you should see the default Eclipse IDE:
Don't feel overwhelmed! Let's take some time to introduce you to Eclipse, step-by-step. Eclipse is a flexible UI framework, it has two main concepts:
Views
A "view" in eclipse is like a sub-window. Every tab that you see on the screen is a "view". You can access any view at any time using "Window", "Show View":
Eclipse has a lot of views, and plugins can add them, as well. This list is mean to contain the most commonly used ones.
Perspectives
A perspective in Eclipse is just a set of views, arranged a certain way. Eclipse comes with some default perspectives- the one you see in front of you is the "Java" perspective, which you can see in the top-right:
You can have as many different perspectives "open" at one time, and switch between then using these controls. You may also customize any perspective- adding views, toolbar buttons, etc, as you see fit.The Java Perspective
The default views available in the Java perspective should be as follows:
Download Eclipse Plugins
Eclipse has a built-in "marketplace" for plugins (think "Fill"). Access it via "Help" menu:
Wednesday, February 2, 2011
Building a Star
I played around with magic some tonight, decided to make a "star" - a giant sphere of lava surrounded by a shell of glass.
I ended up getting something much more organic and fun, and having a pretty crazy time in the process.
I ended up getting something much more organic and fun, and having a pretty crazy time in the process.
 |
| Things had gotten a little out of control by the time I started taking screenshots. My neat superball of lava somehow broke out of its glass supershell, and turned into a giant pillar of fiery death. Rewind was failing me for some reason... |
 |
| I tried to "catch" the falling lava with superblobs of water before it burned up the entire valley. |
 |
| I did get it contained eventually. |
 |
| The end result is actually very organic- it's pretty cool, much cooler than it would have been had my original plan worked! |
 |
| I made such a mess on the ground, though.Tried to clean it up with blob... |
 |
| It's pretty neat up top- I built some interior structure |
 |
| Still dangerous though! |
Monday, January 24, 2011
Bukkit Plugins
I've started making server plugins for Bukkit, and I'll keep track of them here!
Spells : A collection of easy-to-use magic spells for combat, world construction, exploration, and more.
Wand : An extension to Spells, allows console-free spell use with a magic wand.
Persistence : A persistence framework plugin, allowing easy object saving and loading, using SqlLite.
Wandmin : A version of Wand that works with arbitrary console commands.
I've also started some basic API's- right now, Spells is the only thing I've got going. It should be easy to make your own plugin with new spells in it. If you're interested, check it out here.
If you enjoy using any of my plugins, or you appreciate the Spells API, or you're just feeling generous, I would appreciate a donation!
Wednesday, December 29, 2010
IIS 7 Tutorial
-------------------------STEVES TUT FOR IIS 7------------------------------------------------------------
okay guys i decided to simplify and tidy up my tut on w/e pagw iposted it on XD so here we go...
this is aimed at people who have just got a fresh install of winserver 08
ok well it no too hard or complicated to understand to be fair.
all we have to do is these wonderful steps to set up IIS for minecraft and dynmap
SETTING UP OF IIS
1. Run the Server manager application in Windows. If the "Web Server (IIS)" role is not already enabled, click the "Add Roles" link and add the "Web Server (IIS)" role.
2.and select the following services:
"Common HTTP Features" except for "WebDAV Publishing",
everything under "Application Development",
only "HTTP Logging" and "Request Monitor" under "Health and Diagnostics",
and everything under "Security"
then continue with the install thingy..
Installing PHP5
1. download and run this http://windows.php.net/downloads/release...C9-x86.msi
2.when asked for Select the web server you wish to setup choose:
IIS FastCGI
3. when asked Choose Items to install under extensions i install all..
but if you personally dont want to just skip this bit as it installs the minimum of what we need
4.once installed goto X:\Program Files (x86)\PHP\ (where X: is is the drive youve installed your windows srv on) the open up php.ini
and press ctrl+g and type 911
cgi.force_redirect = 1 and replace with cgi.force_redirect=0
;fastcgi.impersonate = 1
;fastcgi.logging = 0 and replace with this fastcgi.logging=1
5. we need to make one more change in the php.ini file. find ;date.timezone = uncomment it and set an appropriate timezone value in my case its Europe/London as i live in wales and my box is in my house heres the list of timezones http://us3.php.net/manual/en/timezones.php
6. save and close the php.ini
SETTING UP MySQL WITH PHPMYADMIN
1. download and run this http://www.mysql.com/get/Downloads/MySQL...mysql.com/
NOTE: WARNING: IF YOUR NOT ON A X64 O/S DO NOE DOWNLOAD TOP LINK DOWNLOAD THIS ONEhttp://www.mysql.com/get/Downloads/MySQL...mysql.com/
2.on the installer choose typical
3. once its finished it should launch the config utility if it doesnt got to start and launch it (should be the first in the list)
4.ok do these:
1.next
2.detailed configuration. next
3.developer machine. next
4.multifuncional database newxt
5.leave as is and push next
6.decission support next
7.leave as is but add the tick into add fire wall exception
8.leave as is next
9.leave as is next
10. enter your pasword for root database user then push next
11. push execute
optional
if you want to add another user and only allow that to use the mysql.... do it ...(im not gona go through that since im the only user thatll have access to my mysql)
SETTING UP PHPMYADMIN
1 download this http://sourceforge.net/projects/phpmyadm...941ab47535
2. whiles its downloading make a folder in X:\inetpub\wwwroot\ called phpmyadmin
3. once downloaded extract the files in the zipped folder to X:\inetpub\wwwroot\phpmyadmin
4.go to the iis manager and under default web site there should be phpmyadmin, right click on that and go convert to application and another window pops up and just go OK
5. goto http://localhost/phpmyadmin and log in with the root and password you set up
6. make a database called minecraft go ok.
SETTING UP MINECRAFT AND PLUGIN
1. download minecraft and extract to X:/Users/Administrator/MC_Server
2. cut everything but the .sh file and the 32 bit bat file (if your using 64) to the root of the MC_Server
3.Delete the rest apart from the .sql files and the .jar and the bat file
4. run the the .bat file as admin then close it again in the properties. change it to whatever you want but since were using MySQL if the files got the data-source=flatfile line just change it to MySQL if not add data-source=mysql and save then run it again
5.it'll error out.. so once it has errored close it then modify the mysql.properties
6. add your mysql password to it and dont change a thing if you have done the same as me soo far.
7. save it and close
8. log into phpmyadmin,
9. select the minecraft database then go import.
10. import all the .sql files in the MC_Server folder startin with minecraft.sql
11. once you have done that go to the users table and add your name and others if you wish thne log out of phpmyadmin.
DYNAMIC MAP SETUP
1. download this http://www.fescen9.com/Minecraft/Plugins...escen9.rar
2. using winrar extract that folder to say. downloads
3. then go into that folder you extracted
4. copy the map.jar to the MC_Server/plugins/
5.copy the colors.txt to MC_Server/
6. copy the contents of web folder to X:/inetpub/wwwroot/map/
7. modify the map.js in the map folder to bve something like this
NOTE:WARNING: this updateUrl: '/map/up/default.aspx?lasttimestamp=', is very very very important since were using iis 7 and its using ASP.NET it must look like that no matter what (your update URL only has to look like that)
8. save that file and close it
9. go to the server.properties file in the MC_Server folder and add map to the plugin line
10. run the server again then wait for it to gen the map, and then when its finished close it down again
11. go to the server.properties file again and edit the line that says map-tilepath=tiles/
to X:/inetpub/wwwroot/map/tiles
i do it that way as i find it easier to get to work than shortcuts or symlinks.
NOTE: where X is is the hardrive letter your server o/s is working from
12. save that file and close it.
13. final step. right click on your wwwroot folder and goto the security tab and go edit click on the IIS_USRS and tick every box except the deny boxes. do the same for the users/computername
13 (i) then go add type in the box at the bottom Everyone then click check names and go ok
13 (ii) make sure all the boxes except the deny boxes are ticked on everyone as well then go apply and ok.
that step makews sure that the Minecraft has access to write to the tiles folder in the wwwroot folder.....
things to remember
there will be occasionally some access denied erros in the console window... but thats ok, as the tile does get made and modified its justa sily thing thats all..
ALSO WHER X:/ IS REFERS TO THE HDD LETTER YOU HAVE YOUR SERVER INSTALLED TO..
OPTIONAL FOR X64 USers only:
you can download the x64 bit of java to remove the 1.5gb limit
to do that download it and install it then modify the .bat file you use and remove the (x86)
so it looks like this
ENDING NOTE...
if you have troubles on people connecting to you go to your firewall and add the port number your minecraft uses to it in the tcp and udp ports to make sure....
if you stilll have problems pm me either your teamviewer or skype details and ill be able to help you
okay guys i decided to simplify and tidy up my tut on w/e pagw iposted it on XD so here we go...
this is aimed at people who have just got a fresh install of winserver 08
ok well it no too hard or complicated to understand to be fair.
all we have to do is these wonderful steps to set up IIS for minecraft and dynmap
SETTING UP OF IIS
1. Run the Server manager application in Windows. If the "Web Server (IIS)" role is not already enabled, click the "Add Roles" link and add the "Web Server (IIS)" role.
2.and select the following services:
"Common HTTP Features" except for "WebDAV Publishing",
everything under "Application Development",
only "HTTP Logging" and "Request Monitor" under "Health and Diagnostics",
and everything under "Security"
then continue with the install thingy..
Installing PHP5
1. download and run this http://windows.php.net/downloads/release...C9-x86.msi
2.when asked for Select the web server you wish to setup choose:
IIS FastCGI
3. when asked Choose Items to install under extensions i install all..
but if you personally dont want to just skip this bit as it installs the minimum of what we need
4.once installed goto X:\Program Files (x86)\PHP\ (where X: is is the drive youve installed your windows srv on) the open up php.ini
and press ctrl+g and type 911
cgi.force_redirect = 1 and replace with cgi.force_redirect=0
;fastcgi.impersonate = 1
;fastcgi.logging = 0 and replace with this fastcgi.logging=1
5. we need to make one more change in the php.ini file. find ;date.timezone = uncomment it and set an appropriate timezone value in my case its Europe/London as i live in wales and my box is in my house heres the list of timezones http://us3.php.net/manual/en/timezones.php
6. save and close the php.ini
SETTING UP MySQL WITH PHPMYADMIN
1. download and run this http://www.mysql.com/get/Downloads/MySQL...mysql.com/
NOTE: WARNING: IF YOUR NOT ON A X64 O/S DO NOE DOWNLOAD TOP LINK DOWNLOAD THIS ONEhttp://www.mysql.com/get/Downloads/MySQL...mysql.com/
2.on the installer choose typical
3. once its finished it should launch the config utility if it doesnt got to start and launch it (should be the first in the list)
4.ok do these:
1.next
2.detailed configuration. next
3.developer machine. next
4.multifuncional database newxt
5.leave as is and push next
6.decission support next
7.leave as is but add the tick into add fire wall exception
8.leave as is next
9.leave as is next
10. enter your pasword for root database user then push next
11. push execute
optional
if you want to add another user and only allow that to use the mysql.... do it ...(im not gona go through that since im the only user thatll have access to my mysql)
SETTING UP PHPMYADMIN
1 download this http://sourceforge.net/projects/phpmyadm...941ab47535
2. whiles its downloading make a folder in X:\inetpub\wwwroot\ called phpmyadmin
3. once downloaded extract the files in the zipped folder to X:\inetpub\wwwroot\phpmyadmin
4.go to the iis manager and under default web site there should be phpmyadmin, right click on that and go convert to application and another window pops up and just go OK
5. goto http://localhost/phpmyadmin and log in with the root and password you set up
6. make a database called minecraft go ok.
SETTING UP MINECRAFT AND PLUGIN
1. download minecraft and extract to X:/Users/Administrator/MC_Server
2. cut everything but the .sh file and the 32 bit bat file (if your using 64) to the root of the MC_Server
3.Delete the rest apart from the .sql files and the .jar and the bat file
4. run the the .bat file as admin then close it again in the properties. change it to whatever you want but since were using MySQL if the files got the data-source=flatfile line just change it to MySQL if not add data-source=mysql and save then run it again
5.it'll error out.. so once it has errored close it then modify the mysql.properties
6. add your mysql password to it and dont change a thing if you have done the same as me soo far.
7. save it and close
8. log into phpmyadmin,
9. select the minecraft database then go import.
10. import all the .sql files in the MC_Server folder startin with minecraft.sql
11. once you have done that go to the users table and add your name and others if you wish thne log out of phpmyadmin.
DYNAMIC MAP SETUP
1. download this http://www.fescen9.com/Minecraft/Plugins...escen9.rar
2. using winrar extract that folder to say. downloads
3. then go into that folder you extracted
4. copy the map.jar to the MC_Server/plugins/
5.copy the colors.txt to MC_Server/
6. copy the contents of web folder to X:/inetpub/wwwroot/map/
7. modify the map.js in the map folder to bve something like this
Code:
var setup = {
    tileUrl:     'http://stevesminecraft.dyndns.org/tiles/',
    updateUrl:   '/map/up/default.aspx?lasttimestamp=', // Or if using ASP.NET: http://www.yourdomain.com/minecraft/up/default.aspx?lasttimestamp=
    updateRate:  2000,    //Seconds the map should poll for updates. (Seconds) * 1000. The default is 2000 (every 2 seconds).
    showPortraitsOnMap: true,
    showPortraitsInPlayerList: true,
    showPlayerNameOnMap: false
};8. save that file and close it
9. go to the server.properties file in the MC_Server folder and add map to the plugin line
10. run the server again then wait for it to gen the map, and then when its finished close it down again
11. go to the server.properties file again and edit the line that says map-tilepath=tiles/
to X:/inetpub/wwwroot/map/tiles
i do it that way as i find it easier to get to work than shortcuts or symlinks.
NOTE: where X is is the hardrive letter your server o/s is working from
12. save that file and close it.
13. final step. right click on your wwwroot folder and goto the security tab and go edit click on the IIS_USRS and tick every box except the deny boxes. do the same for the users/computername
13 (i) then go add type in the box at the bottom Everyone then click check names and go ok
13 (ii) make sure all the boxes except the deny boxes are ticked on everyone as well then go apply and ok.
that step makews sure that the Minecraft has access to write to the tiles folder in the wwwroot folder.....
things to remember
there will be occasionally some access denied erros in the console window... but thats ok, as the tile does get made and modified its justa sily thing thats all..
ALSO WHER X:/ IS REFERS TO THE HDD LETTER YOU HAVE YOUR SERVER INSTALLED TO..
OPTIONAL FOR X64 USers only:
you can download the x64 bit of java to remove the 1.5gb limit
to do that download it and install it then modify the .bat file you use and remove the (x86)
so it looks like this
Code:
@echo off
"%ProgramFiles%\Java\jre6\bin\java.exe" -Xms4G -Xmx4G -jar Minecraft_Mod.jar nogui
pauseif you have troubles on people connecting to you go to your firewall and add the port number your minecraft uses to it in the tcp and udp ports to make sure....
if you stilll have problems pm me either your teamviewer or skype details and ill be able to help you
Sunday, December 19, 2010
Wand-er-ing Off
I've made my Wand plugin official! I've released it on the hMod forums here:
[MECH] Wand
I'll be supporting it there, but probably not adding anything major to it in the future. The core functionality will find its way into the RPG framework, though in a slightly different form.
[MECH] Wand
I'll be supporting it there, but probably not adding anything major to it in the future. The core functionality will find its way into the RPG framework, though in a slightly different form.
Thursday, December 16, 2010
Wand-er
For my RPG plugin, I've veered off slightly, first making a "magic wand" interface.
The commands to use the plugin are:
/wand bind <command> : "Enchants" your wand (stick) with a spell (command)
/wand unbind <command> : Remove a spell from your wand
/wand list : List all spells bound to your wand
You control your wand with the mouse:
left-click: Cast the currently active wand spell
right-click: Cycle through enchanted spells
So far, it's been a lot of fun to use.
My ultimate goal is to have this tie into a "spell" system, which will be a framework for spell names, costs, and requirements.
I also think it would be nice to restrict enchanting the spell to a workbench or some other specialty block- so you can't add new spells to your wand on the fly.
I'm currently thinking it would be great if each spell could be associated with a specific object. Then, to bind your wand to a spell, you would place the wand and that object in your workbench.
These are all loose ideas, of course. Currently I'm just having fun blinking around and then boom'ing up the world like some kind of insane evil wizard.
Subscribe to:
Posts (Atom)